How to setup InfluxDB, Chronograf and Telegraf for development
InfluxDB, Chronograf and Telegraf are part of TICK stack from InfluxData.
To install it on Ubuntu you could use apt-get package manager, or install it via .deb package. I prefer the second method.
You can find install instructions on their download page.
After installation there are two config files you have to change a little to make things work.
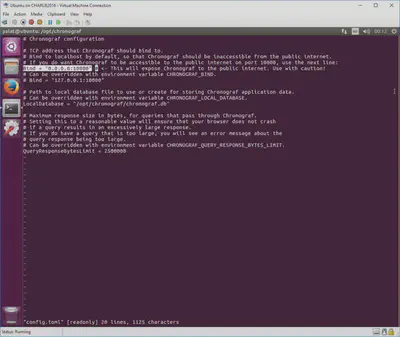
First one is located in /opt/chronograf/ under name ‘config.toml’. Inside you have to expose Chronograf to public internet (see picture).
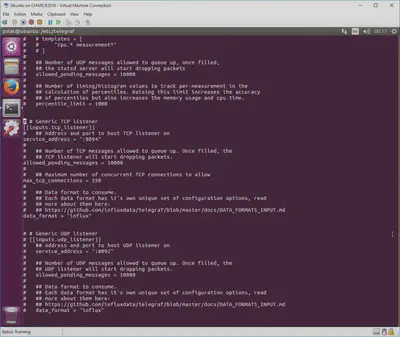
Second one is located in /etc/telegraf/ under name ‘telegraf.conf’. My advice would to first to comment everything you don’t need, and then uncomment stuff you need. In my case I needed Generic TCP listener (see picture).
After that all you need is to start the required daemons in usual manner.
sudo service influxdb start
sudo service telegraf start
sudo service chronograf start
Chronograf is accessible via port :10000 (http://127.0.0.1:10000)
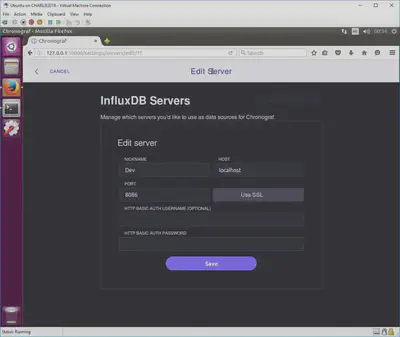
After opening Chronograf web interface you will have to setup InfluxDB server. Picture below should be sufficient for you to complete that task.
You are done. Now all that is left is to start filling InfluxDB time-series DB with some data, and visualize it on Chronograf interface.
Petar Šlat
Software engineer / SRE / DevOps / AWS Cloud Architect
My current interests are in automation and optimiztions in computing. Slow is smooth, Smooth is fast.